










Updated 7 hours ago
Why Solar Drip Irrigation Systems Lose Flow at the End of the Line: What Buyers Should Test
SCARECROW GARDEN SUPPLIER

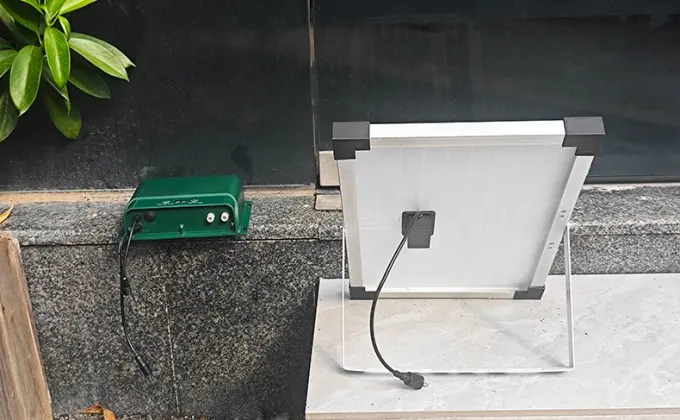
Full set of solar drip irrigation parts, solar panel and irrigation controller placed outdoors
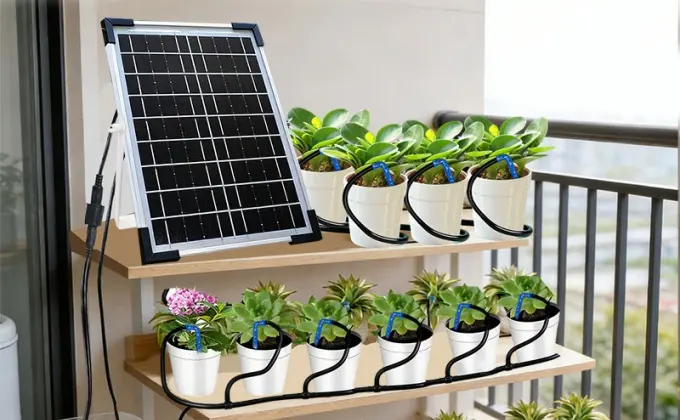
A customer sets up a 15-dripper solar irrigation kit. The first few drippers, closest to the pump, deliver a steady stream. The last few drippers, at the end of the line, barely produce a trickle. The customer assumes the pump is too weak or the kit is defective. Often, neither is true — the problem is pressure loss along the tubing, and it is predictable, measurable, and testable before the product reaches the customer.
This article is a diagnostic guide — not a pump curve tutorial or a system sizing guide. The focus here is: when the last drippers are weak, how do you isolate the cause?
The Buyer Complaint: Near Emitters Work, Far Emitters Do Not
This is one of the most common complaints for small drip irrigation kits. The pump is rated for a maximum flow — say 400 mL/min — but that flow is measured at the pump outlet, not at the last dripper on a 15-meter tube. By the time water travels through the full length of tubing, passes through multiple T-joints and connectors, and reaches the last emitter, the pressure has dropped. The flow at the end is lower than the flow at the beginning.
The symptom is not necessarily a product defect. It may result from system configuration, elevation, tubing loss, emitter variation, or an actual component problem. But it becomes a product complaint when the marketing material says “15 drippers” and the customer expects all 15 to deliver equal water. If the last 3 drippers produce noticeably less flow, the customer perceives the product as underperforming.
Four Possible Causes — and How to Isolate Each
When the last drippers are weak, one or more of these four factors is responsible:
1. Tubing pressure loss — Water moving through a tube loses pressure due to friction against the tube walls. The longer the tube, the greater the loss. The narrower the tube inner diameter, the greater the loss. Every T-joint, elbow, and connector adds additional resistance. On a 15-meter line with 15 T-joints, the cumulative pressure loss can be significant.
Diagnostic: Measure flow at the first dripper and the last dripper. If the first dripper delivers significantly more than the last, pressure loss along the line is the primary cause. To confirm, temporarily shorten the line to 5 meters with 5 drippers and retest — if the flow difference disappears, the tubing length and ID are the issue.
2. Elevation — If the water source is below the drippers (e.g., a bucket on the ground, drippers on a balcony railing), the pump must lift water against gravity. Each meter of elevation gain reduces the available pressure at the drippers.
Diagnostic: Lower the reservoir to different heights and measure flow at the last dripper at each height. If the flow drops sharply when the reservoir is 50–100 cm below the drippers, elevation is a major factor. The pump may not have enough head for the customer’s intended installation height.
3. Pump capacity — The pump may be undersized for the number of drippers on the line. A pump rated at 400 mL/min with 15 drippers gives each dripper approximately 27 mL/min in theory — but the first drippers get more and the last get less. Adding more drippers than the kit specifies makes the problem worse.
Diagnostic: Remove the last 5 drippers from the line and check if the remaining 10 deliver more uniform flow. If they do, the pump is overstretched for 15 drippers. The kit configuration may need a higher-flow pump or fewer drippers per line.
4. Emitter variation — The drippers themselves may vary in flow due to manufacturing tolerances. This is a separate issue from pressure loss — it affects individual drippers, not just the last ones.
Diagnostic: Swap the first dripper with the last dripper. If the first position still delivers more flow (regardless of which dripper is installed), the cause is system pressure loss. If the same dripper delivers low flow regardless of position, the cause is dripper variation.
The First/Middle/Last Emitter Diagnostic Test
This is the core diagnostic procedure. It takes 15 minutes and isolates the most likely cause of end-of-line flow loss:
- Set up the kit on a flat surface — Reservoir, pump, tubing, and all drippers at the same elevation. This eliminates the elevation variable and isolates the tubing and emitter effect.
- Connect all drippers in the standard configuration — Full tubing length, all T-joints, all drippers in position. Do not shorten the line.
- Run the pump for a fixed period (e.g., 5 minutes) and collect water from three positions: the first dripper, the middle dripper, and the last dripper. Use small cups or graduated cylinders to measure the output at each position.
- Compare the three measurements:
- If first ≈ middle ≈ last → The system is balanced. No flow-loss issue.
- If first >> middle >> last → Pressure loss along the line is the primary cause. Check tube ID, line length, and emitter count.
- If first ≈ middle but last is much lower → The last few T-joints or the end cap may be restricting flow. Check for a kinked tube or a partially blocked T-joint near the end.
- If the variation is random (not position-dependent) → Emitter variation is the cause.
- Repeat with the reservoir at different heights — Lower the reservoir 50 cm below the drippers and repeat. If the flow at the last dripper drops significantly more than at the first, elevation is amplifying the pressure loss. This tells you the kit’s realistic operating envelope.
- Record the results — First, middle, and last emitter output at each elevation. This becomes the reference for evaluating whether the kit performs as claimed and for comparing against future orders.
How to Turn the Diagnostic Into a Kit-Size Claim
The test results should inform how the product is marketed:
- If all 15 drippers deliver roughly equal flow at the same elevation, the “15-dripper” claim is supported.
- If the last 3 drippers deliver significantly less flow, the product description should reflect the tested performance — not an unverified capability claim. Base the dripper count claim on actual test results, not on theoretical maximums.
- If the kit is intended for use with the water source below the drippers (e.g., ground-level bucket, balcony-level plants), the test results at the realistic elevation should be the basis for the claim, not the best-case flat-surface results.
Review our current solar watering kit, then send your target watering points, tubing layout, quantity and packaging requirements for comparison.
View Solar Drip Irrigation KitThe goal is not to make the product look bad. It is to ensure that the customer’s real-world experience matches the product claim. A customer who buys a “15-dripper kit” and finds that all 15 work well is satisfied. A customer who finds that the last 3 barely produce water is not — and the difference is not the product quality, it is the gap between the claimed capability and the tested performance.
Related Articles

Pump Head vs Flow Rate in Solar Irrigation: Why Buyers Need Both Numbers