







Updated 3 months ago
Commercial Seedling Tray Buying Guide: Sizes, Cell Counts, Materials and Nursery Applications

ScarecrowGarden
💡About Scarecrow Garden Supplier Co., Ltd.
Scarecrow Garden Supplier Co., Ltd. is a China-based sourcing and wholesale partner specializing in garden tools, landscaping equipment, and outdoor supplies for international wholesalers, distributors, contractors, and brands.
With hands-on experience rooted in real garden use scenarios, we focus on durable materials, functional design, and stable large-volume supply. Our product range covers pruning tools, watering systems, hand tools, outdoor hardware, and customized garden solutions to support both retail and professional landscaping markets.
Beyond products, we help our partners navigate supplier selection, quality control, compliance requirements, and long-term sourcing strategies in China. Through our blog, we share practical insights on product selection, material comparisons, industry trends, and cost-effective purchasing—helping global buyers build stronger, more competitive supply chains.

Commercial Seedling Trays Buying Guide: Sizes, Materials & Wholesale Specs | Scarecrow Garden Supplier
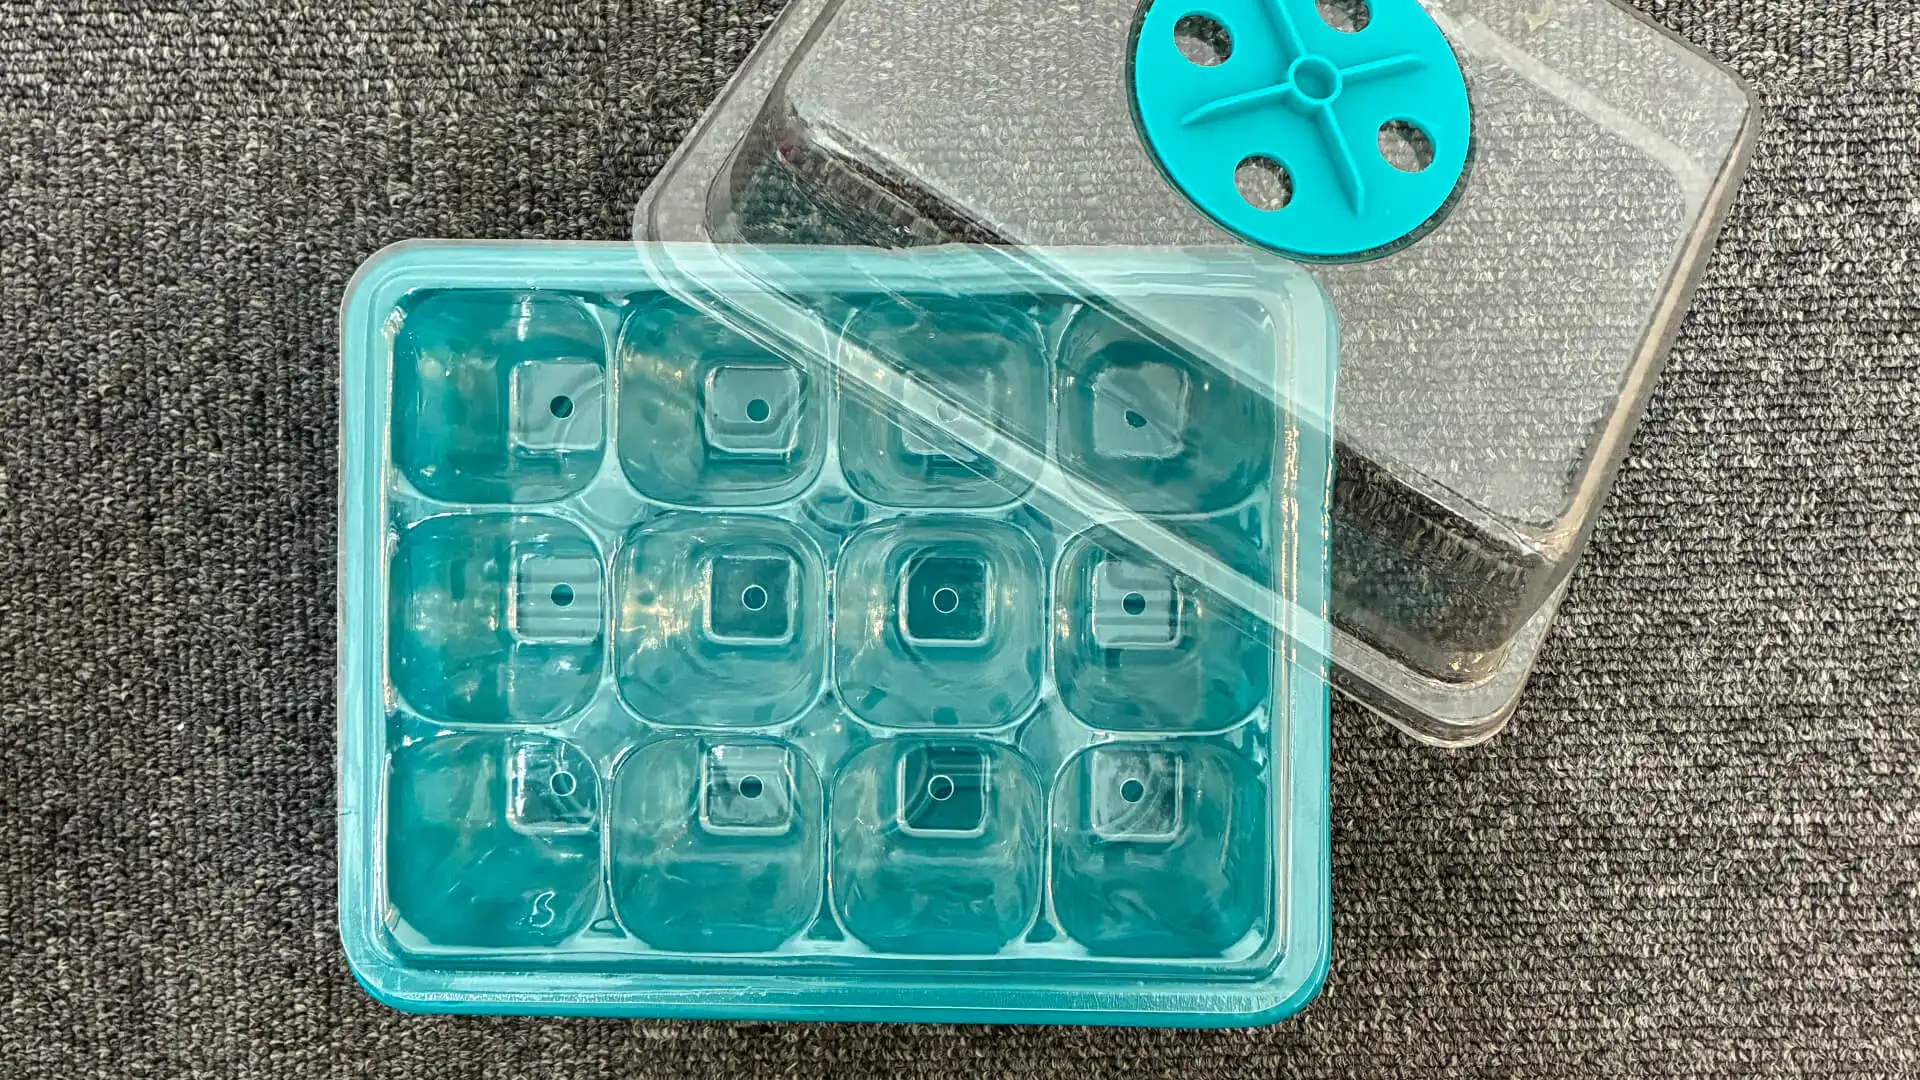
A seedling tray is not one product. It is a system of three components — base tray, plug insert, and humidity dome — that must fit together and work together. If any one piece does not match, the whole system underperforms: domes that pop off during greenhouse airflow, inserts that wobble inside the base, base trays that flex when you carry them loaded with wet media. This guide covers the dimensions, cell counts, materials, drainage designs, dome heights, and equipment compatibility that commercial growers need to specify before placing a bulk order. Every section includes the data you need to make a specification decision — and the gaps that only a physical sample can fill.
When the tray system includes a clear cover, the humidity dome height for propagation and tissue culture plants must also match the crop height and propagation stage.
1. Tray System Basics: Base Tray, Plug Insert and Dome
When you order “1020 trays,” you are ordering one piece of a three-part system. Understanding what each piece does — and why they must be specified together — prevents a common purchasing mistake: ordering components that do not fit.
| Component | Function | Key Specification |
| Base tray | Carries the insert, collects drainage, provides rigidity for handling | Overall length × width, with or without drainage holes, rim design |
| Plug insert | Holds individual cells of growing media and seedling roots | Cell count, cell depth, cell volume, drainage hole pattern |
| Humidity dome | Retains moisture and warmth during germination and early growth | Height, vent type, clarity, fit with base tray rim |
Why does this matter? Because the base tray and dome must lock together to maintain humidity. The insert must sit flat in the base tray so roots contact the drainage surface. And when you carry a loaded tray — typically 2 to 5 kg of wet media, water, and seedlings — the base tray alone bears the weight. If you specify only the insert’s cell count and ignore the base tray’s rigidity, you get a tray that bends when you pick it up.
Specify all three components together. Test them as a set.
2. Standard Names vs Actual Dimensions
“1020” is a name, not a dimension. It tells you a tray is roughly 10 inches by 20 inches. It does not tell you the exact length, width, corner radius, rim width, or lip height — and those differences determine whether a dome clicks on or sits loose.
The actual dimensions of a “1020” tray are closer to 10½ × 21 inches (approximately 26.7 × 53.3 cm). The global standard format is 54 × 28 cm — but even that has variation.
| Common Name | Nominal Meaning | Actual Outside Dimensions | Key Gap |
| 1020 tray (North American) | “10 × 20 inches” | Approximately 26.7 × 53.3 cm (10½ × 21 in.) | Actual is 0.5–1 inch larger than nominal |
| 54 × 28 tray (European/Global) | 54 × 28 cm | 54.0 × 28.0 cm | Close to 1020, but not always interchangeable |
| 1020 dome | Fits “1020 tray” | Depends on manufacturer | Clip design varies by brand — cannot assume cross-brand fit |
Across suppliers, actual 1020 tray dimensions can vary by 5 to 10 mm. That is enough to prevent a dome from another manufacturer from seating properly, or to make an insert wobble inside the base. Corner radius, rim width, and lip design are rarely listed in product descriptions — but they are the dimensions that control fit.
What this means for buyers:
- Do not assume that a “1020 dome” from Supplier A will fit a “1020 base tray” from Supplier B. Test the physical fit before committing to a bulk order.
- When you find a compatible set, lock the specification: record the exact dimensions, the supplier, and the product code. If you later switch one component, re-test the full set.
- A single sample can confirm fit. It cannot confirm batch consistency. That requires a weight and dimension check on the production batch — which is what pre-shipment inspection is for.
Not sure whether your current trays are compatible with a new insert or dome? Share the dimensions or a photo — we can check before you commit.
3. Choosing Cell Count and Cell Volume
Once you know your trays fit together, the next question is: how many cells do you need — and how big should each one be?
Cell count is where most buyers start — and where many stop. But cell count alone does not determine how a seedling grows. Cell volume, cell depth, and cell shape all affect root development, transplant quality, and the economics of your propagation operation.
For a crop-by-crop selection framework, see how to choose the right plug tray cell count for different nursery crops.
Cell Count and Volume Ranges
| Cell Count | Approx. Volume per Cell | Typical Use |
| 512 | ~7 mL (microgreens only) | Microgreens, very small-seeded crops — not suitable for standard transplant production |
| 288 | ~12 mL | Lettuce, brassicas, herbs, annual flowers |
| 200 | ~20 mL | Short-cycle tomatoes, peppers, cucumbers |
| 128 | ~35 mL | Tomatoes, peppers, herbs, flowering annuals |
| 72 | ~55 mL | General vegetables — one of the most widely used greenhouse sizes |
| 50 | ~85 mL | Melons, squash, larger transplants |
| 32 | ~120+ mL | Tree seedlings, deep-root crops, large ornamentals |
These ranges are a starting point. But the relationship between cell count and cell volume is more nuanced than a table suggests — and the research tells a more interesting story.
Why Cell Volume Matters More Than Cell Count
Research on tree seedlings tested two cell volumes in the same tray format: 150 mL and 300 mL. The larger cells produced bigger seedlings in the nursery — but after field planting, the 150 mL seedlings performed better. Their root systems were more compact and established faster, leading to higher survival rates. The takeaway: bigger is not always better. The right cell volume depends on what happens after the tray, not just what happens in it.
The practical takeaway: higher cell counts save greenhouse space but constrain root growth. Lower cell counts cost more per unit of bench space but produce stronger transplants. The right balance depends on your crop, your growing period, and the price your transplants command.
4. Matching Tray Design to Crop and Growing Duration
There is no universal “best” cell count. The right choice depends on what you are growing, how long it stays in the tray, and what happens after transplanting.
| Crop Type | Typical Time in Tray | Suggested Cell Range | Key Verification Point |
| Vegetable transplants (tomato, pepper) | 4–6 weeks | 72–128 | Root ball integrity at pull |
| Leafy greens (lettuce, brassicas) | 3–4 weeks | 200–288 | Drainage under frequent irrigation |
| Herbs and flowers | 2–4 weeks | 200–288 | Seed placement accuracy in small cells |
| Melons and squash | 6–8 weeks | 50–72 | Cell depth for deep root systems |
| Tree and shrub seedlings | 8–16+ weeks | 32–50 | Root direction and air pruning |
| Tissue culture acclimatization | 2–4 weeks | 72–128 | Dome height and vent control |
These are starting ranges, not final recommendations. Your substrate, irrigation method, climate control, and transplant schedule all affect performance. The most reliable way to confirm a cell choice is a small comparative trial at your facility — not a catalog recommendation.
But the logic behind these ranges becomes clearest when you compare two operations side by side. A nursery that grows tomatoes for six weeks before field transplanting has different needs than one that grows lettuce for three weeks and sells it in the tray. The tomato grower needs root ball integrity — a plug that holds together when pulled. The lettuce grower needs drainage under frequent irrigation and a tray that fits the retail display. Same 54 × 28 cm footprint, completely different specification priorities.
5. PP, PET, PS and Recycled Materials
The right cell count and volume tell you what to grow. The material tells you how many times you can grow it.
You receive a shipment of PS trays. The first time you wash them, three corners crack. That is not a defect — that is what PS is designed for. Single use, then discard.
Material choice determines how long a tray lasts, how it handles under load, and whether it survives your cleaning process. It also affects the unit price — but the unit price is not the full cost story.
Material Properties
A grower in Oregon who washes and stacks 2,000 trays between cycles has a completely different material calculation than a Florida operation that transplants and discards. The Oregon grower needs trays that survive a pressure washer. The Florida grower needs the cheapest tray that holds together for one cycle. Same product category, opposite material priorities.
| Material | Characteristics | Typical Use |
| PS (Polystyrene) | Rigid, low cost, brittle, poor UV resistance | Disposable or single-season use |
| HIPS (High-Impact PS) | More impact-resistant than PS, slightly higher cost | 1–3 seasons with careful handling |
| PP (Polypropylene) | Flexible, heat-resistant, UV-tolerant when stabilized, durable | Heavy-duty, multi-season reuse |
| PET (Polyethylene Terephthalate) | Clear, food-contact capable | Domes and specialty applications |
| PLA (Polylactic Acid) | Compostable, single-use, highest cost | Organic certification, sustainability claims |
Thickness, Weight and Expected Service Life
| Thickness | Approx. Unit Weight | Expected Service Life |
| 0.5 mm | ~60 g | Single use |
| 0.7 mm | ~90 g | 1–2 seasons |
| 1.0 mm | ~155 g ±5 g | 2–4 seasons |
| 1.2 mm | ~185 g | 3–5+ seasons (heavy-duty) |
| 1.8 mm | ~250 g+ | 5–10+ seasons (based on industry experience; most commercial operations report 3–8 seasons under regular use) |
Service life estimates are based on industry experience and depend on handling, cleaning, UV exposure, and storage conditions.
These numbers tell you what a material can do. But the real question is about your operation — do you have the washing and storage process to reuse trays, or does every cycle start fresh?
A 0.5 mm PS tray at roughly $0.15 and a 1.0 mm PP tray at roughly$0.45 (based on industry experience; actual prices vary by specification and order volume) are not directly comparable by unit price. The PP tray that lasts four seasons costs $0.11 per season — less than the PS tray used once — but only if you actually clean, store, and reuse it. If your operation does not have a washing and storage process, the heavier tray’s extra cost is wasted.
Here is a simplified calculation framework so you can plug in your own numbers:
- PP tray unit cost: $0.45 ÷ 4 seasons = $0.11 per season
- Cleaning labor: ~$0.04 per tray per cycle (based on industry experience)
- Storage cost: ~$0.01 per tray per cycle (space allocation)
- Breakage adjustment: ~$0.02 per tray per cycle (estimated 10% loss per season)
- Total cycle cost: $0.11 +$0.04 + $0.01 +$0.02 = $0.18
Your numbers will be different — that is the point. The calculation is specific to your operation. But the framework lets you compare accurately: PS at $0.15 per cycle versus PP at$0.18 per cycle with full cost accounting. The gap narrows, and at five or more reuse cycles, PP typically becomes the lower-cost option.
Recycled and Bio-Based Materials
Recycled PP content of 30–100% is already commercially available, representing a growing but still minority share of plastic tray revenue. Recycled PP performs close to virgin PP in structural terms, but color consistency and dimensional tolerances may vary slightly between batches.
Bio-based and compostable trays (peat, coconut fiber, wood pulp, PLA) represent a growing segment — but they serve a different purpose. They can be planted directly, reducing transplant shock, and studies suggest improved establishment rates compared to plastic trays pulled and transplanted manually. The trade-off is cost: bio-based trays are typically the most expensive option per unit, and they are single-use by design.
6. Drainage, Air Pruning and Root Release
Drainage holes do more than let water out. Their size, position, and pattern control root direction, air access, and how easily a seedling pulls free at transplant time.
When a tree seedling stays in a closed-bottom cell for twelve weeks, the roots circle the bottom, hit the wall, and spiral. That spiral becomes a structural defect that shows up years after the tree is planted — long after the nursery has sold it. The drainage hole pattern is a key factor in whether that spiral develops.
Drainage Hole Types
| Type | Description | Best For |
| Standard bottom holes | Round, 6–10 mm diameter | General propagation |
| Bottom + side wall holes | Additional lateral openings | Crops needing more aeration |
| No holes (solid base) | Water-retaining for bottom-irrigation | Capillary mat or flood-table systems |
| Open-bottom / air-pruning | Large openings or slotted base | Root-training, tree seedlings |
If you have ever pulled a root-bound plug from a 72-cell tray and watched the root ball fall apart, you have already experienced what the wrong drainage pattern does. The roots circled the bottom, fused together, and when you pulled the plug, there was no structure left to hold the media. The right drainage design prevents that — and the research behind air pruning explains why.
Air Pruning: What the Research Shows
A study comparing propagation trays with different levels of substrate exposure found that open-design trays (high substrate exposure) produced roughly three times less deflected coarse root weight compared to closed-bottom trays — meaning significantly fewer circling roots. This root quality advantage persisted from the greenhouse through field establishment — though above-ground growth differences were not immediately visible.
This matters because a root defect that is invisible at transplant can cause structural instability years later in a tree or shrub. For nursery growers producing long-lived plants, air-pruning tray design is not a premium feature — it is a risk management decision.
For vegetable and flower growers producing short-cycle transplants, air pruning is less critical — the plant is out of the tray before root circling becomes a problem. But if you grow perennials, trees, or any crop that stays in the tray for more than eight weeks, the drainage and air-access design of the cell bottom is typically worth specifying carefully.
Root Release
How easily a plug slides out of the cell depends on the cell wall taper, the drainage hole size, and the substrate composition. Cells with an appropriate taper angle (typically 10–15°, based on manufacturer specifications) and large bottom openings release plugs with less root disturbance. Cells with parallel walls and small holes may hold the root ball too tightly, causing tearing during pull.
Some designs include vertical ribs inside the cell wall — not to make the wall smoother, but to guide roots downward instead of letting them circle. If your team transplants by hand, root release affects labor speed. If you use mechanical transplanters, it affects machine jam rates. Test both.
7. Heavy-Duty vs Disposable Construction
The question is not “which is cheaper?” It is “which costs less per growing cycle?”
Key Comparison Factors
| Factor | Heavy-Duty (PP, 1.0 mm+) | Disposable (PS, 0.5–0.7 mm) |
| Unit price | Higher | Lower |
| Seasons of use | 3–10+ with proper care (based on industry experience; most operations report 3–8 seasons) | 1 |
| Cleaning cost | Required between cycles | None |
| Storage cost | Space needed in off-season | None |
| Breakage rate | Lower, but not zero | Higher, especially at rim and corners |
| Handling when loaded | Rigid, single-tray carry possible | May require double-tray technique |
| Best fit | Operations with wash/disinfect process and storage | Large-scale, transplant-and-discard workflow |
For a complete calculation that includes reuse cycles, cleaning, storage and breakage, read our comparison of heavy-duty vs disposable seedling trays.
That is the qualitative picture. But your decision is not qualitative — you need to calculate the actual cost per growing cycle.
This is where the numbers get real.
The break-even point depends on your actual cleaning labor, storage availability, and breakage rate — not on the factory’s quoted unit price. If you are comparing two quotes, normalize the data: calculate cost per successful growing cycle, not cost per tray.
Here is a simplified example. A PS tray at roughly $0.15 (based on industry experience; actual prices vary) used once costs$0.15 per cycle. A PP tray at roughly $0.45 that lasts four seasons costs$0.11 per cycle — but only if you actually reuse it four times. Add cleaning labor, storage space, and a 10 percent per-season breakage rate, and the PP tray’s real cycle cost might be $0.18. Your numbers will be different. That is the point — the calculation is specific to your operation.
Share your current tray price, breakage rate and reuse cycles. We can compare cost per growing cycle with heavier options.
8. Humidity Dome Height and Ventilation
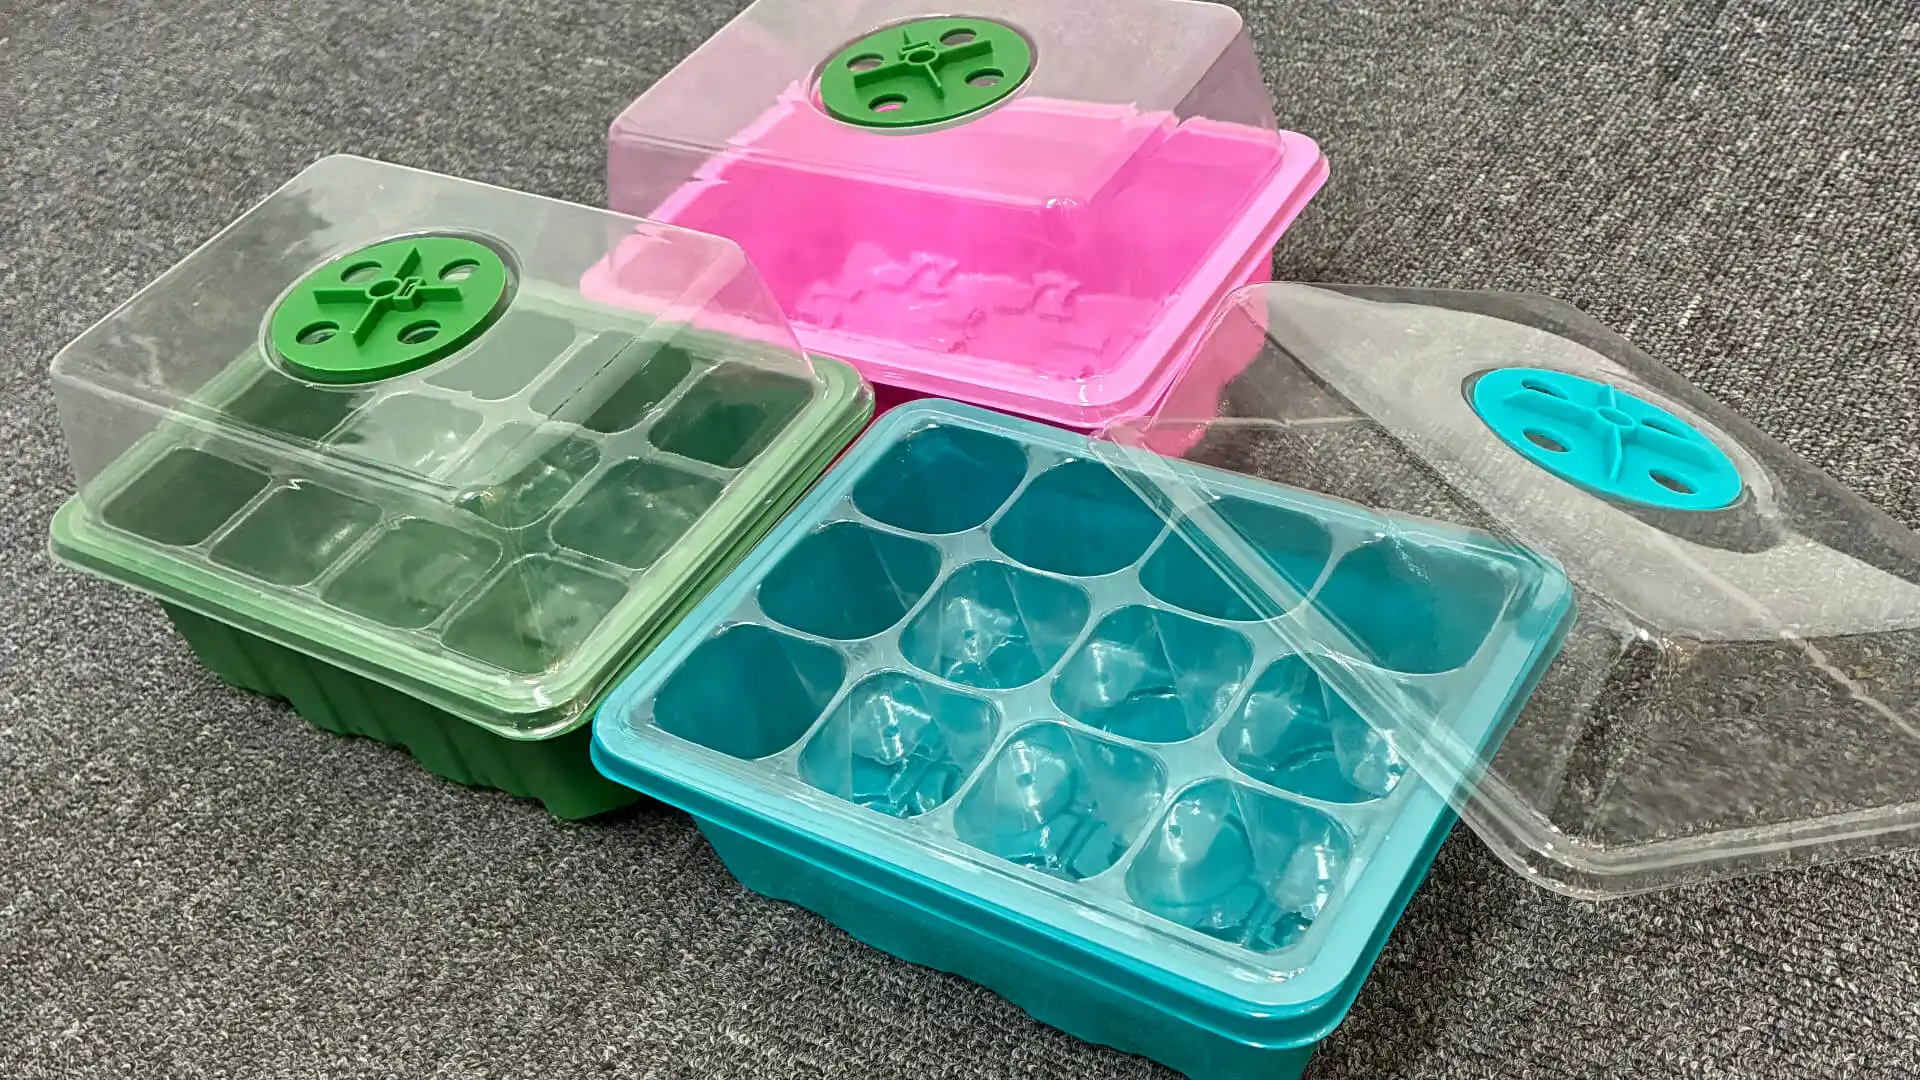
A humidity dome creates a microclimate. The right height depends on what you are germinating or rooting — and the wrong height either crowds the foliage or wastes bench space with unnecessary clearance.
If you have ever lost a tray of cuttings to damping-off because the dome was too tight, or watched seedlings stretch because the dome was too tall — you already know that dome height is not a minor specification.
Three Height Categories
| Height Range | Application | Key Feature |
| 2–3“ (5–7 cm, low dome) | Seed germination | Maintains high humidity; remove once seedlings emerge |
| 4–6“ (10–15 cm, medium dome) | Seedling growth, cuttings, early vegetative stage | Room for leaf expansion; adjustable vents |
| 6–10“+ (15–25+ cm, high dome) | Tissue culture acclimatization, tall cuttings | Maximum vertical space; top + side vents |
Think about a greenhouse that germinates tomato seeds and roots rose cuttings in the same week. The tomatoes need a low dome — just enough humidity to keep the media moist until the cotyledons emerge, then the dome comes off. The rose cuttings need a medium dome with adjustable vents, because they will spend four to six weeks under cover while callus forms and roots develop. Remove the dome too early and the cuttings wilt. Leave it on too long and they rot. Same greenhouse, same bench, two completely different humidity management workflows — and two different dome heights. If you run both crops, you need both domes.
Vent Design
- Fixed vents (punched holes): Simple, low cost, no adjustment. Works for germination where you remove the dome early.
- Adjustable vents (rotating or sliding valves): Allow gradual humidity reduction without removing the dome. If your tissue culture plantlets need to step down from high humidity to ambient over seven days, adjustable vents are typically essential — propping the dome open manually is too inconsistent for that workflow.
- No vents: Maximum humidity retention. Requires manual venting by propping open the dome. Risk of condensation buildup and fungal issues if left closed too long.
Clarity and Condensation
Clear domes (PET) allow light transmission and visual inspection. But condensation on the inner surface can block light and drip onto seedlings, increasing disease risk. Anti-fog additives reduce condensation but add cost. If your crop is sensitive to foliar diseases, vent management matters more than dome material.
One practical detail: a dome that fogs heavily makes it hard to inspect seedlings without removing it — and every removal disrupts the humidity environment. If your team checks flats frequently, consider domes with adjustable vents so you can reduce condensation without lifting the lid.
9. Compatibility with Benches, Racks, Heat Mats and Machines
You have confirmed the tray fits your bench. Now what happens when 1,000 sets arrive at your loading dock?
When you order 1,000 sets of a 1020 system, the domes, base trays, and plug inserts arrive in three different carton sizes — typically 100 domes per carton, 80 base trays per carton, and 150 plug inserts per carton (based on industry experience; actual counts vary by supplier and cell configuration). That is roughly 625 kg of product across multiple carton sizes, which affects your warehouse layout, your unloading time, and your per-set landed cost. If your warehouse team expects uniform cartons, they will be surprised. Plan the logistics before the container arrives.
That is the logistics reality. Before you even get to the loading dock, there is the equipment compatibility question — and it is easy to overlook, expensive to fix after you have received a container of product.
Before you sign off on a specification, walk your facility with a tape measure and check these four things:
- Bench and rack width. Does the tray fit within the support rails? A 1020 tray that is slightly wider than your bench spacing will tip or fall.
- Heat mat size. Does the base tray sit flat on the mat without overhang? Overhanging trays heat unevenly. Note: if you use perforated plug inserts directly on a heat mat, water can seep through the drainage holes and damage the mat. Use a solid base tray as a barrier layer.
- Flood table depth. Does the tray rim clear the table edge so water can flow underneath for bottom irrigation?
- Seeding and transplanting machines. If you use mechanical seeders or transplanters, the tray’s rim geometry, nesting behavior, and dimensional consistency determine whether the machine picks, fills, and ejects correctly. One sample is not enough for machine trials — you typically need a full carton to test continuous operation.
If you run automated equipment, talk to us — share your machine model and your current tray dimensions, and we can prepare a controlled trial batch.
10. Sample Testing and RFQ Specification Sheet
You just received a sample. You hold it, flex it, set it on the bench. Feels about right. But “about right” is not enough when you are ordering 10,000 units — below are twelve measurements that turn “about right” into “confirmed” before you commit.
Before you specify a tray system for bulk production, test it. A sample confirms dimensions, material feel, component fit, and loaded handling. It does not confirm batch consistency or long-term durability — those require production-run inspection and in-use tracking.
Twelve Dimensions to Measure Before Approving a Tray System
| # | Measurement | Tool | Why It Matters |
| 1 | Overall length | Tape measure | Bench and rack fit |
| 2 | Overall width | Tape measure | Bench and rack fit |
| 3 | Overall height (with insert) | Caliper | Dome clearance, stack height |
| 4 | Rim width | Caliper | Dome seating, machine pickup |
| 5 | Corner radius | Caliper | Dome fit at corners |
| 6 | Lip height | Caliper | Dome retention |
| 7 | Cell depth | Caliper | Root volume, substrate fill |
| 8 | Cell top opening diameter | Caliper | Seeding accuracy |
| 9 | Drainage hole diameter | Caliper | Drainage rate, air pruning |
| 10 | Unit weight | Scale (0.1 g precision) | Material consistency, batch quality |
| 11 | Loaded deflection (center) | Ruler + weight | Rigidity under wet media |
| 12 | Nesting gap (empty stack of 10) | Caliper | De-nesting behavior |
RFQ Specification Fields
When you request a quotation, include these fields so the supplier knows exactly what you need:
- Product type (base tray / plug insert / dome)
- Cell count and target cell volume
- Material (PS / HIPS / PP / PET)
- Target unit weight or thickness
- With-holes or no-holes (base tray)
- Dome height and vent type
- Color
- Quantity and delivery schedule
- Destination country
- Incoterms preference (FOB / CIF / DDP, etc.)
- Packaging requirements (bulk or retail-ready)
- Compliance requirements (e.g., EU 10/2011 food contact, REACH)
- Required delivery date
The more specific your RFQ, the fewer rounds of revision you will need — and the less likely you are to receive a product that “looks right” but does not match your system.
You do not need to measure all twelve every time. But when you are qualifying a new supplier, switching components, or changing materials, this checklist catches problems before they become a container of unusable trays.
Tell us what you grow and what is not working with your current trays. Scarecrow Garden Supplier will put together a sample set so you can test the fit before you commit.
FAQ
What does “1020” actually mean?
“1020” refers to a tray that is approximately 10 inches by 20 inches. It is a naming convention, not a dimensional standard. Actual measurements vary between manufacturers — typically closer to 10½ × 21 inches — and components from different suppliers may not fit together. Always test physical compatibility before ordering in bulk.
Is a higher cell count always more efficient?
Higher cell counts let you produce more seedlings per square foot of bench space. But smaller cells constrain root growth, which can reduce transplant quality and field performance. The most efficient cell count depends on your crop, growing period, and the value of your finished transplants — not just the number of cells per tray.
Can I reuse PS trays for more than one season?
Standard PS trays (0.5–0.7 mm) are designed for single-season use. They may survive a second cycle with very careful handling, but brittleness increases after UV exposure and cleaning. If you plan to reuse trays, PP or HIPS at 1.0 mm or thicker is typically a more reliable choice — and often costs less per growing cycle.
Do I need a humidity dome for every crop?
Not every crop benefits from a dome. Seeds that germinate quickly in warm conditions may not need one. But for slow-germinating seeds, cuttings, and tissue culture acclimatization, a dome significantly improves success rates. If you are unsure, start with a low dome and remove it as soon as seedlings emerge.
How many samples should I order to test a new tray system?
One complete set (base tray + insert + dome) confirms fit and basic handling. For machine compatibility or batch consistency testing, order a full carton. If you are comparing multiple options, request one set of each and evaluate them side by side at your facility.
What is air pruning and do I need it?
Air pruning happens when root tips contact air at the cell opening or drainage hole, causing them to stop growing downward and branch instead. This produces a more compact, fibrous root system. Research shows open-wall trays produce roughly three times fewer circling roots than closed-wall trays. If you grow trees, shrubs, or any crop that stays in the tray for more than eight weeks, air-pruning design is worth specifying. For short-cycle vegetable transplants, it is less critical.
Find the Right Tray for Your Growing System
Tell us what you grow and what is not working with your current trays. We will put together a sample set so you can test the fit before you commit.
Written by
ScarecrowGarden
💡About Scarecrow Garden Supplier Co., Ltd.
Scarecrow Garden Supplier Co., Ltd. is a China-based sourcing and wholesale partner specializing in garden tools, landscaping equipment, and outdoor supplies for international wholesalers, distributors, contractors, and brands.
With hands-on experience rooted in real garden use scenarios, we focus on durable materials, functional design, and stable large-volume supply. Our product range covers pruning tools, watering systems, hand tools, outdoor hardware, and customized garden solutions to support both retail and professional landscaping markets.
Beyond products, we help our partners navigate supplier selection, quality control, compliance requirements, and long-term sourcing strategies in China. Through our blog, we share practical insights on product selection, material comparisons, industry trends, and cost-effective purchasing—helping global buyers build stronger, more competitive supply chains.