








Updated 2 months ago
How to Evaluate Plant Label Samples Before Bulk Ordering
SCARECROW GARDEN SUPPLIER

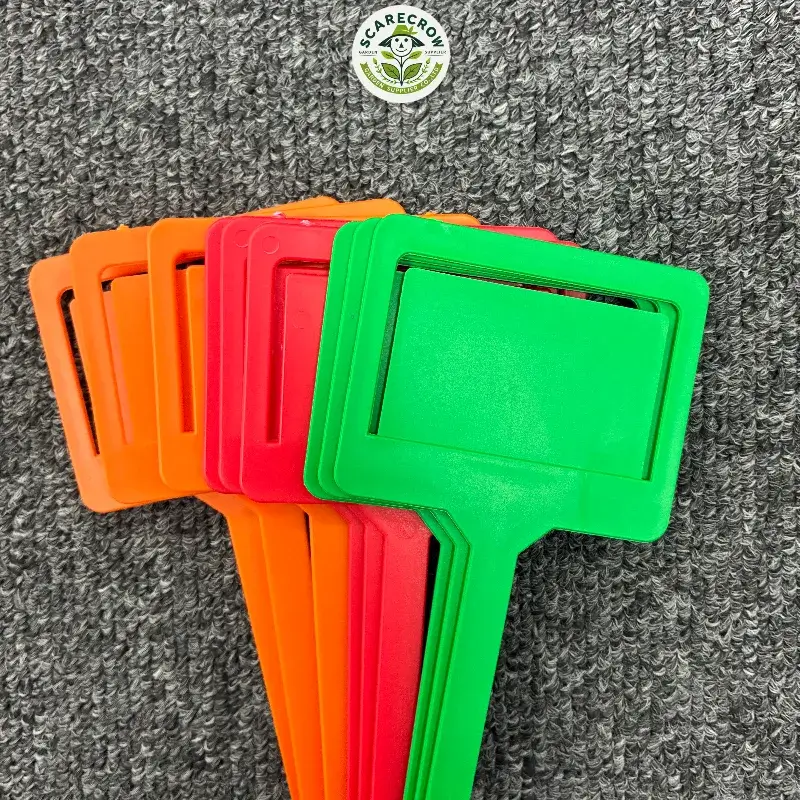
Plant label sample being measured and tested for writing and pot fit
A distributor receives sample plant labels from a new supplier. The labels look good — clean edges, consistent colour, sturdy feel. The distributor approves the order. 50,000 pieces arrive.
At the warehouse, the problems start. The labels are 14cm long, not 15cm — close enough to pass visual inspection, but short enough to tip over in 1-litre pots. The writing surface works fine with a permanent marker, but the distributor’s retail customers use pencils — and the pencil marks are barely visible on this surface finish. The stake diameter is 4mm, but the distributor’s pot trays have 3.5mm slots — the labels do not fit without forcing them in, which cracks the PP at the stake-head junction.
None of these are visible in a product photo. None of these are detectable by looking at the sample and thinking “this looks fine.” Every one of them would have been caught by a structured sample test — if the distributor had run one.
A sample is not just for confirming that the product looks acceptable. It is primarily for verifying that the product matches your specification, fits your application, performs in your writing test, and packs the way you need it to. The rule is simple: if you can approve the sample without picking up a tool — a caliper, a marker, a pot — you have likely not tested it. You have admired it. (Illustrative example. Actual specifications, pricing, and outcomes vary by supplier, quantity, and order requirements.)
For the specification baseline that should be defined before sample approval, start with our [plant label specification guide for wholesale buyers].
A Sample Is for Verification, Not Just Appearance
Before diving into specific tests, it helps to frame what a sample approval is actually for. A sample approval is not a subjective “looks good” decision. It is a structured verification that the product meets four criteria:
Specification match — Does the sample match the dimensions, material, colour, and construction you specified?
Application fit — Does the label actually fit the pot, tray, or display it is intended for?
Writing performance — Can you write on it with the tools your customers will use — and is the writing legible?
Packaging and handling — Does the product arrive and pack in a way that works for your operation?
Each of these requires a specific test, not a general impression. The steps below walk through each one.
Step 1 — Check Dimensions and Construction
Start with measurements. Do not trust the spec sheet — verify it against the physical sample.
What to Measure
| Dimension | Tool | What to Check |
| Overall length | Ruler or caliper | Matches specified length within agreed tolerance |
| Head width | Caliper | Matches specified width — affects writing area and shelf fit |
| Stake diameter | Caliper | Matches specified diameter — affects fit in pot/tray slots |
| Stake-to-head junction | Visual + manual | No gaps, cracks, or weak points at the weakest structural point |
| Hole position (if applicable) | Ruler | Hole placement matches spec — affects hanging or tying |
| Hole diameter (if applicable) | Caliper | Matches spec — affects hardware fit (wire, string, clip) |
What to Look For
- Overall length tolerance — A 14cm label specified as 15cm is a 6.7% deviation. Whether a given deviation matters depends on your application and the tolerance agreed in your order specification. If no tolerance was defined in the PO, discuss acceptable deviation with the supplier before placing the order. It may not affect a garden bed stake, but it may matter for a pot label that needs to clear the soil line.
- Stake diameter — This is the most commonly overlooked dimension. A 0.5mm difference between the stake and the slot it goes into can mean the difference between a snug fit and a loose tip-over — or a forced fit that cracks the plastic.
- Construction integrity — For PP labels, check the stake-to-head junction. This can be a weak point in injection moulding, depending on gate placement and mould design. Bend the label gently — if it snaps at the junction, the moulding may have a structural issue.
Record every measurement. Do not rely on memory — write it down or photograph it with the caliper reading visible. This record becomes your baseline for bulk order comparison.
Step 2 — Check Surface and Writing Performance
Dimensions tell you what the label is. Writing tells you whether it works. Writing performance is not a single test. It depends on the interaction between three variables: the label surface, the writing tool, and the environmental conditions.
Choose the Right Writing Tools
Test with the tools your customers will actually use — not the pen you happen to have on your desk:
| Writing Tool | Why to Test It |
| Permanent marker | The most common writing tool for nursery and garden use |
| Garden pencil | Used by customers who want to erase and reuse labels |
| Chalk marker | Used on slate labels for a premium, erasable look |
| Ballpoint pen | Some retail customers use whatever is in their pocket |
Test Sequence
For each writing tool, run this sequence on each label surface:
Write — Write a plant name and a date. Use normal pressure, not excessive force.
Wait — Allow a standard dry time — for example, check at 30 seconds, then again at 5 minutes. Actual dry time varies by marker brand, ink formulation, and surface finish. These intervals are buyer-defined comparison points, not industry standards. Pencils are immediate.
Smudge test — Lightly run a finger across the writing. Does it smear?
Erase test (only if reuse is intended) — Erase with the appropriate tool (eraser for pencil, damp cloth for chalk marker). Is there residue?
Water test — Lightly spray or splash water on the written surface. Does the writing run or fade?
What to Record
| Label SKU | Writing Tool | Initial Legibility | Dry Time | Smudge | Erase | Water Resistance |
| PP white T-head | Permanent marker | |||||
| PP white T-head | Garden pencil | |||||
| Slate rectangle | Chalk marker |
Fill in this table with Pass / Fail / Notes and attach photos. This is not a formal laboratory test — it is a practical comparison that tells you whether the surface works with the tools your market uses.
For PP format, writable-area and surface-selection details, see our [PP plant label selection guide].
Step 3 — Check Fit in the Intended Application
A label that writes well on the bench may still fail in the pot. The only way to know is to put it in the container it is meant for.
Test in Real Containers
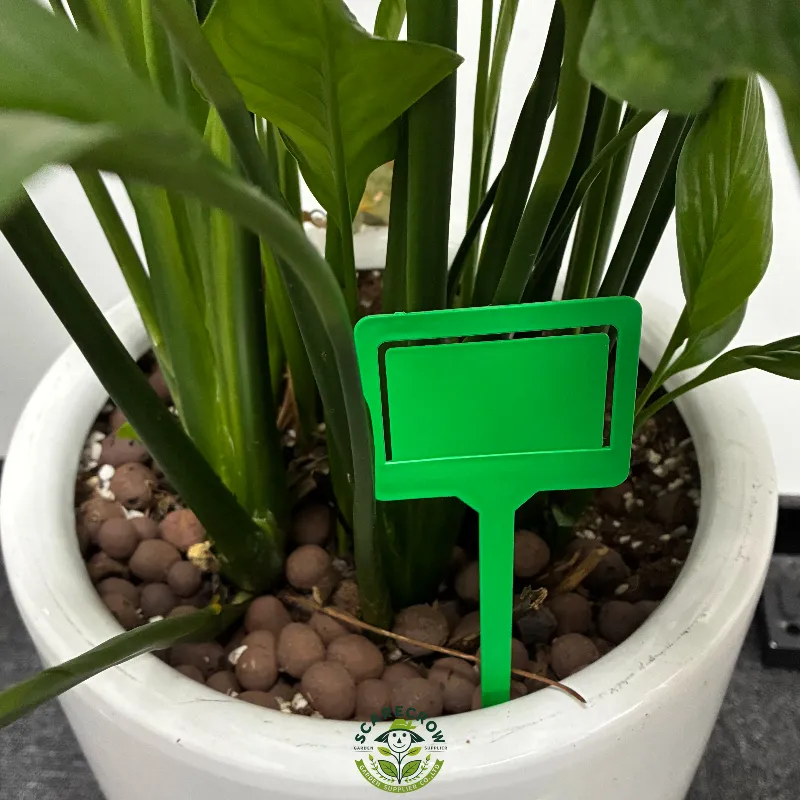
- Plug trays — Insert the sample label into the cell size you use. Does the stake reach the soil without poking through the bottom? Does the head sit between rows without shading adjacent cells?
- Pots — Insert the label into the pot size you sell. Does the stake anchor securely? Does the head clear the rim? If the pot has a label slot, does the stake fit the slot?
- Retail packs — If the label is sold as part of a set, does it fit the retail packaging you plan to use? Does the pack close properly with the labels inside?
- Soil test — Push the stake into actual potting soil, not just air. Soil resistance can reveal flexibility or brittleness that air testing does not.
What to Look For
- Stake fit — Too loose means the label tips over. Too tight means it cracks on insertion or is hard for staff to push in.
- Head proportion — A head that is too large for a small pot looks disproportionate. A head that is too small for a large pot is hard to read.
- Bend and recover — Does the label bend when pushed into soil and return to upright? Or does it stay bent? Based on typical PP label construction, the material should have some flexibility — if it snaps or stays deformed, the material may be too rigid or too thin for the intended application.
Step 4 — Check Appearance and Finish
A label that fits the pot and writes cleanly may still have production defects that affect your customer’s perception. This is the step most buyers do already — but often without structure. The goal is not to judge whether the label “looks nice” but to check for defects that indicate production quality issues.
PP Labels — Check For:
| Check | Pass | Fail |
| Flash / mould lines | Minimal or no visible flash at parting line | Excess flash that needs trimming, or visible mould line that affects appearance |
| Surface finish | Consistent across the head and stake | Rough patches, sink marks, or gloss variation |
| Colour | Consistent within the sample batch | Visible colour difference between samples in the same batch |
| Flatness | Label lies flat when placed on a surface | Warping, bowing, or twisting that affects insertion or stacking |
| Edge condition | Clean edges, no burrs | Rough or sharp edges that could cut fingers or catch on packaging |
Slate Labels — Check For:
| Check | Acceptable | Not Acceptable |
| Surface texture | Natural variation in colour and texture | Deep pits or fractures that affect writing surface |
| Edges | Natural, possibly slightly uneven | Sharp burrs or large chips that could cut or crumble further |
| Cracks | Hairline surface veining (natural) | Structural cracks that go through the label body |
| Hole position (if applicable) | Roughly centred, functional | Off-centre enough to weaken the label or prevent hanging |
| Thickness | Within agreed tolerance (e.g. ±0.5–2mm, depending on supplier) | Consistently outside tolerance, affecting stacking or packaging |
For slate, the key distinction is between natural variation (which is expected and acceptable) and structural defects (which are not). A hairline vein in the stone surface is not a crack. A practical screening check: run a fingernail along the line as a quick screening check. If your nail catches, investigate further — it may be a crack. If it slides smoothly, it is likely surface veining. When in doubt, confirm with the supplier’s QC or compare against the approved visual standard. Define the line before you approve the sample — not after the bulk order arrives.
For slate-specific material, edge and construction checks, use our [slate plant labels buying guide].
Step 5 — Simulate Basic Handling and Packing
A label that passes every individual test may still fail when it meets your warehouse operation. A sample that looks perfect on the bench may jam in the packing line, shatter in the carton, or arrive at your customer’s door looking damaged.
Handling Simulation
- Stack test — Stack 20 labels the way they would be packed. Do they nest cleanly, or do they interlock and jam?
- Count test — If the labels are sold by count (e.g. 10 per pack), can your staff count and pack them efficiently? Labels that stick together can cause miscounts.
- Carton test — Put the packed labels into the carton size you plan to use. Does the carton close without crushing? Is there enough protection to survive shipping?
- Drop test — Drop a packed shipping carton from 1 metre (approximately waist height for most adults). Open it and check for label damage. This is especially important for slate labels. (This is an internal handling simulation, not a formal transport packaging test. If formal packaging testing is required, agree the test method and standard with the supplier.)
What This Reveals
Handling tests reveal problems that spec sheets do not: labels that are too sticky to count efficiently, cartons that are too full to close properly, packaging that does not protect slate edges in transit. These are operational issues — but they become quality issues if they reach the customer.
Approve Plant Label Samples With A Clear Specification Framework
Use the specification framework before approving a physical sample. Review key requirements clearly before production, including product details, materials, dimensions, printing requirements, and packaging expectations.
Create a Written Approval Record
Once all five steps are complete, document the results. This record serves two purposes:
Approval baseline — The photos, measurements, and Pass/Fail results become the standard against which the bulk order is compared. If the bulk order differs from the approved sample, you have evidence — not just a feeling that “something is different.”
Communication tool — If the sample has issues, the record gives you a structured way to communicate them to the supplier. “The stake diameter measures 4.2mm, but our pot slots are 3.5mm — please adjust to 3.5mm” is far more actionable than “the sample does not fit.”
What to Include in the Record
| Item | Format |
| Sample photos (front, back, edge, close-up of junction) | JPEG, labelled with SKU and date |
| Measurement table (all dimensions from Step 1) | Spreadsheet or form |
| Writing test results (Step 2 table) | Filled table with photos |
| Application fit photos (Step 3) | Label in pot / tray / pack |
| Appearance check results (Step 4) | Pass/Fail table with notes |
| Handling test notes (Step 5) | Written observations |
| Overall decision | Approved / Approved with conditions / Not approved |
| Date and signature | Name, date, role |
What to Send Back to the Supplier
If the sample passes, communicate approval with the record attached — so the supplier knows exactly what was approved, not just that “the sample is OK.”
If the sample does not pass, send back:
- Photos of the specific issue — not a general “quality is not good”
- Measurements that differ from spec — with the expected and actual values
- Location of the problem on the product — e.g. “stake-to-head junction, left side”
- Expected result — what you need changed before placing the bulk order
This level of specificity helps the supplier fix the problem. A vague “the sample is not acceptable” gives the supplier nothing to act on — and the next sample may have the same issue.
Need Help Matching The Right Sample?
Share the target size, material, application and pack requirement for sample matching. We will review your specifications and help identify a suitable product direction before moving forward.
A Sample Test Is Cheaper Than a Bulk Order Mistake
Thirty to sixty minutes of structured testing — caliper, marker, pot, water, drop — is the cheapest insurance you will ever buy against a 50,000-piece problem. The distributor in the opening story lost time, money, and customer trust because they admired a sample instead of testing it. Do not make that the opening story of your next order.
Request samples from two or three candidate suppliers. Run the same five-step test on each. The comparison will tell you more than any spec sheet or sales pitch — because it shows you how the product behaves in your hands, in your containers, with your writing tools.
Verify Your Plant Label Samples Before Bulk Production
Discuss samples for verification before moving to a bulk order. Review product details, material quality, printing results, and packaging requirements before committing to larger quantities.
Related Articles
Plant Label Specification Guide for Wholesale Buyers
How to Choose PP Plant Labels for Nursery & Retail
Slate Plant Labels Buying Guide for Bulk Orders